
Introduction ('Home')
Construction Phase
General Photographs
Pot Furnace Repair Photographs
Pot Furnace Marver Photographs
Small Furnace Construction
Lehr Construction Photographs
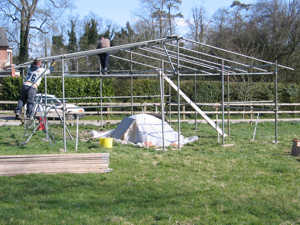 Following the demolition of the tank furnace and annealing oven in April 2006, we began to build a new furnace, a separate annealing oven (lehr), and repaired the pot furnace - all under a new shelter. This year, we added a small room in one corner, essential for office work!
The new structures had seven days to dry as much as possible before they were fired, with the wind and the sun helping the process.
During the construction of the new structures, a geophysical survey of the site was undertaken. We hope to have further surveys in the future for comparison and to see if differences in the readings develop over time.
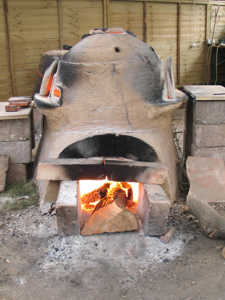 This furnace replaced the tank furnace and used the existing fire chamber. We built the superstructure from daub, in the same way as the previous furnaces, but the interior was designed differently. In an effort to suspend a pot over the fire chamber, we embedded four large fragments of Roman tile into the daub wall jutting into the furnace interior and used them as brackets for a large tile sitting about 50cm above the floor of the fire chamber. On this we placed two pots: a large one for the main supply of glass, and a small one for coloured glass.
The superstructure was of about the same dimensions as those of the tank furnace, but had a few differences. As the lehr was to be a separate structure, the furnace had no attached constructions. It did, however, have two gathering holes, one of the normal, upturned U-shape, and one circular, with a fired ceramic tube lining it.
We incorporated a removable roof to this furnace so we could access the pots, if necessary. A thick layer of newspaper acted as a separator as we built the dome.
The look of the furnace was important, so we paid attention to details such as the surrounds to the gathering and warming holes, as well as to the holes in the roof. The surround for the larger gathering hole was also useful as it offered a flat surface for the collar and stopper to rest against.
Not having to build a fire chamber saved a lot of time, so this superstructure took only a couple of days to build.
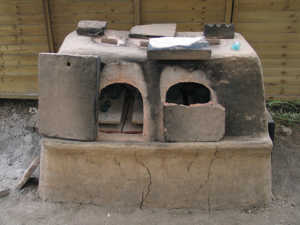 The previous annealing oven, heated by waste gases from the tank furnace, had some limitations and design faults, so we replaced it with a lehr with its own firing pit.
The new design was rectangular in plan, with the four sides sloping inwards towards a flat roof. The walls and the roof were built of daub, with the roof strengthened by a lattice of interwoven twigs - essentially wattle and daub. There was a stoke hole at each end of the pit, two large doorways to the annealing chamber and three holes in the roof for venting the gases. We re-used the doors from the previous oven and the tile floor suspension structure was the same as that of the small furnace.
This structure, complete with its pit, also took only two days to build.
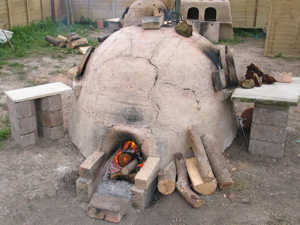 This had been protected during the winter with an insulation layer of dry hay in plastic sacks and covered with a plastic sheet, so it had been kept dry and frost-free. There was, however, some damage to the stoke hole entrance and one of the shelves had fallen off.
The damage to the entrance had been caused by the rough treatment it had received during the previous year's firing. Some of the daub covering the tiles of the lower part of the wall had fallen away, so it was replaced with fresh daub.
The shelf had fallen away as it had not been fully integrated with the wall when the furnace had been built. The use it had received in the previous year had loosened it, causing it to detatch. This was a more serious problem which we solved by digging a substantial dovetail-shaped channel into the wall below the gathering hole, where the new shelf was to be. We packed this with fresh daub and built the new shelf out from it as a single unit.
As it dried, the daub shrank away from the wall, but we regularly filled the gaps, eventually ending up with a solid shelf, securely attached to the furnace. As we refired the furnace, some small gaps appeared, but the shelf itself caused no problems during the three weeks glassworking.
For this year's firing, we mounted the marvers on substantial supports, and used stools and an old chair (provided by our landlord!) when glassworking. The marvers can be seen in the photographs.
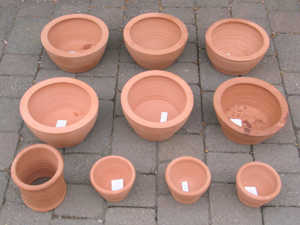 The pots were made from the same terracotta clay, grogged with sand, and to the same shape as those we used in the previous year. This year, we did not coat them with a layer of daub, as there had been no gain from this procedure. We put five large pots in the pot furnace and one in the small furnace.
This year, we also used three small pots: two for experiments in the pot furnace and one for coloured glass in the small furnace. The photograph to the right also shows the ceramic lining for the small furnace gathering hole.
"If you build it, they will come."