The processes described here are those we use for making the more developed canes found in early Imperial composite mosaic glass as discussed by Grose*. Earlier forms of canes require additional techniques, and will be covered separately (see Newsletter 5). (We are aware of the danger of categorising rods and canes too rigidly: there is a certain amount of overlap. For instance, several 'patellae' we have seen include the much earlier spiral-pattern cane cross-sections and a hemispherical bowl illustrated by Grose* (No. 186) includes cane cross-sections of a concentric pattern.)
*(D. F. Grose (1989) 'Early Ancient Glass' New York: Hudson Hills Press (ISBN 0-933920-92-X))
- A rod is a single-colour length of glass. It can vary in length, diameter and cross-section. The usual cross-section is circular, but square and rectangular are both useful. We have extended the use of this term to include bi-colour rods, a length of glass made from two gathers of different colours, one casing the other. Rods are the components of canes.
- A cane is the result of the arranging of rods, single and bi-colour, and other canes to create a specific pattern, which are then fused, cased if necessary, and stretched.
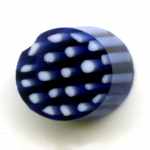
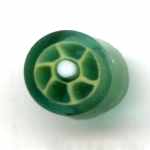
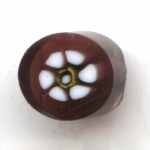
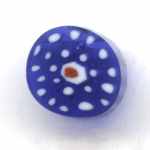
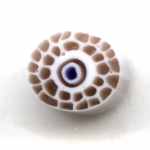
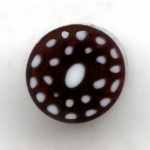
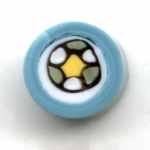
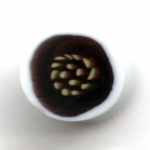
- A floret is our term for a small cross-section of cane, typically c.3mm - 5mm thick and c.8mm - 12mm in diameter.
- A network cane is a length of glass of one colour with a spiral of another colour wrapped around it. In early Imperial composite mosaic glass they are sometimes found as rim canes, but as they make their appearance in the Hellenistic period, they will also be considered along with earlier forms of canes.
Cane Types:
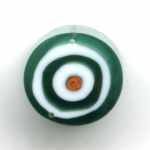
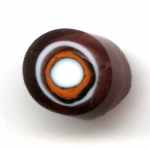
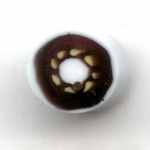
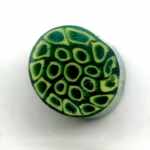
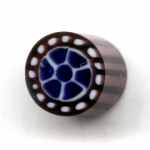
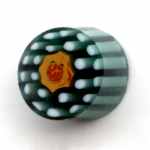
There are three basic types (examples above): those with concentric rings, those with many tiny rods dispersed in the matrix and those with a pattern resembling a spoked wheel, elements of each of which can be combined to form hybrids. Concentric patterns are the simplest to make and involve repeated gatherings of coloured glasses to build up the pattern. The other two types, and any hybrids (examples below) have to be assembled using component rods.
Rod and Cane-making:
All of the processes described below can be performed by one person working alone.
- A rod is the simplest length to make. A small gather of glass is heated to ensure an even temperature. As it cools down from orange heat it is allowed to lengthen. When cool enough to offer resistance, the end is gripped with pincers or parrot-nosed shears and is carefully stretched. In this way one person can make lengths of up to 2.5m, although we tend to stay between 1m - 2m, depending on the thickness required (up to c.5mm). This diameter is controlled by the speed of stretching.
- A bi-colour rod is made by first gathering a small amount of glass of the inner colour, marvering it to a cylinder (making it effectively a continuation of the gathering iron (bit iron)), and cooling it by plunging it into cold water. The beauty of this technique is that the outer surface of the glass is rapidly cooled and stiffened whilst the centre stays much hotter. This aids production as the subsequent re-heating of the glass after the second gather is speeded. After gathering the outer colour, the method for stretching is the same as for a single colour rod.
- A cane has to be assembled from cut sections of rod. Our method is to cut 5cm lengths and assemble them in the required pattern, temporarily hold the bundle of rods together with an elastic band, then tighten a length of wire around it, using a pair of pliers. The finished bundles are pre-heated in a kiln to 570°C, picked up on a bit iron (with an appropriately-sized and coloured punty wad formed into a small post with a flat end by tapping it vertically on the floor), and re-heated in the glory hole. Before the wire is removed, the free end of the bundle is marvered together. It is then a case of re-heating and marvering to achieve an even temperature and cylindrical shape, allowing the cane to lengthen as it cools, and stretching it as with rods. The finished cane can be anything from 30cm - 1m, depending on the amount of glass and the desired thickness.
A variation of this method occurs when the pattern requires the cane to be cased in one or more colours. The bundle is picked up and fused as described above. It is shaped into a short cylinder and dipped into water as for bi-colour rods. The casing is gathered, and the excess sheared off. With opaque white casing, as much is scraped off as possible, with the excess being immediately returned to the pot. In this way a thin casing is achieved, with very little waste glass - an important consideration when working, as we do, with a small pot capable of holding no more than 2kg of glass. Repeat casings are sometimes necessary in order to build up the pattern. Finally, the 'proto-cane' is re-heated and stretched.
Annealing rods and canes:
After being made all canes and some rods require a basic annealing. We find that placing them in a hot kiln (570°C) which is turned off at the end of the working period is sufficient, since they do not need a full annealing cycle. Thin single colour and bi-colour rods do not need to be annealed at all, but thicker bi-colour rods, particularly those with a thin outer coating of opaque glass, do.
The annealing cycle allows the fabric of the glass to relax without distorting the shape of the glass. This removes the possibility of the glass cracking due to stresses. Complex canes prove difficult to break into florets if not properly annealed.
Once the canes have annealed and cooled they are ready to be cut into florets. There are several ways to do this:
- Using a pair of pincers they can be snipped off the cane. This can prove tiring on the hands, however, and it is only possible to snip smaller diameters of cane (c.1cm). Long handles on the pincers can help.
- They can be cut all the way through using a diamond saw. Obviously this was not available to the Romans, and is time-consuming.
There are two quicker methods, both of which require a preparatory 'notching' process. We notch our canes using a diamond saw, but a thin rotating cutting stone could be substituted.
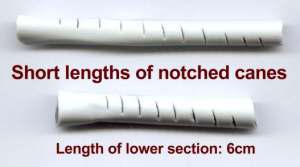 The notches act as 'crack-starters', and guides for the next procedure:
- Again, using a pair of pincers, they can be snipped quickly and easily.
- The method we use is for one person to rest the notched cane (notch uppermost) above a thin anvil which is directly under the notch, whilst holding a sharp chisel vertically in the notch itself. The second person taps the chisel with a hammer, and the floret is sheared off neatly and easily. This is a very rapid way of cutting florets, and is very similar to a technique known to have been used for the production of tesserae by ancient mosaic floor artists.
The angle at which the cane floret sections are cut is important. There is evidence on original vessels which shows that canes were deliberately cut at an angle. The flat areas of composite mosaic plates show florets sloping at angles which cannot be explained by movement of the glass during a slumping process. Cutting florets at an angle of approximately 60° will allow the sections to overlap during assembly of a disc, cutting down on the size of gaps between the canes. This helps to speed the fusing operation.
Speculations on assembling canes the Roman way:
Nowadays it is a simple matter to wire bundles of rods together for heating and fusing. Wire may not have been so readily available to ancient glassmakers, so it is worth considering other methods of cane assembly.
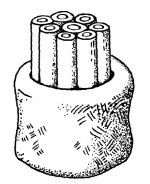
- One method is to arrange heated rods on a marver and pick them up by rolling hot glass (attached to a gathering iron) across them. Many of the cane patterns could have been made using this method.
-
Another method which could be used is to tie bundles of rods together with, perhaps, thin strips of leather, and placing the bundles into a cylindrical container made of fired clay (or to arrange them directly in the cylinder).
We have tried this method using short ceramic cylinders made from clay and fired to c.1100°C. As they are of a fixed diameter it is sometimes necessary to pack any spaces with an inert material such as small potsherds. Used carefully, these cylinders or rings could last for a long time. (We have been using two ceramic cylinders, which have survived repeated heating and cooling for ten days.)
Mark Taylor and David Hill
|
vitrearii @ romanglassmakers . co . uk |
0044 (0)1264 889688 |
Unit 11, Project Workshops, Lains Farm, Quarley, Andover, Hampshire SP11 8PX, UK
Our website is revised regularly. A recent addition covers the subject of our reproductions of mould-blown beakers from the 1st century AD.
www.romanglassmakers.co.uk
Mark and David


 The notches act as 'crack-starters', and guides for the next procedure:
